Wednesday, November 18, 2015

New Patterns from Mrs. Depew Vintage

Hello my dears. Before the great headache of 2015 (we're on day 13 now, super fun times) I was working up a storm on some new sewing patterns for Mrs. Depew Vintage. All are swoon-worthy lingerie pattern reproductions. A few you might even recognize from my crazy S-Series obsession (yes, I'm still hunting).

Not only are these lovelies available in multiple sizes (I've graded the patterns to every size the original pattern was available in back in the day) but they're also available in both paper, and instant download versions!
So without further ado...


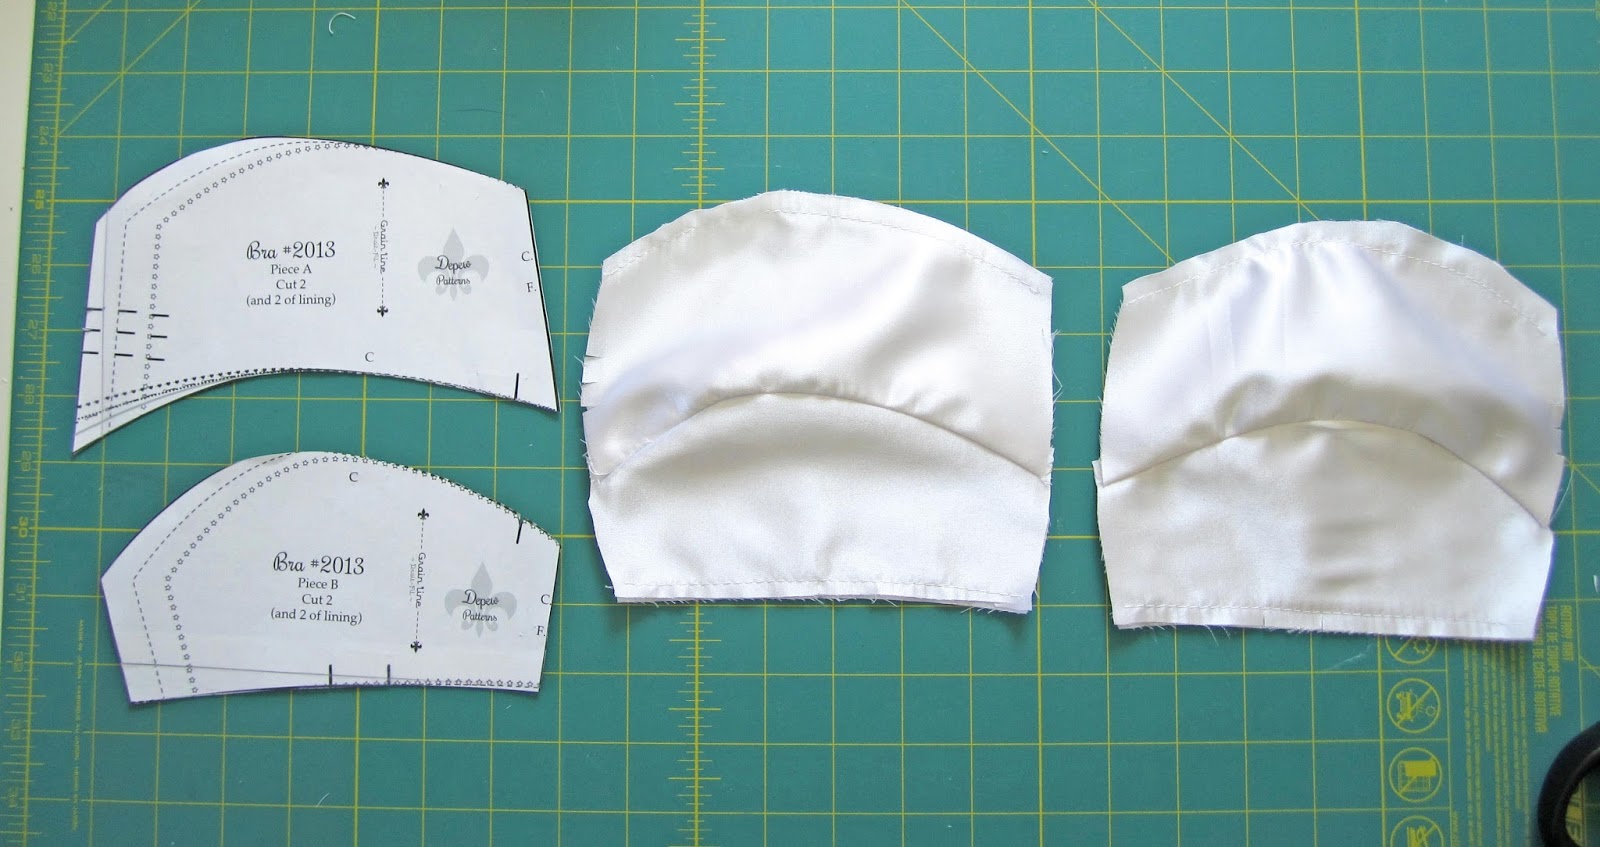
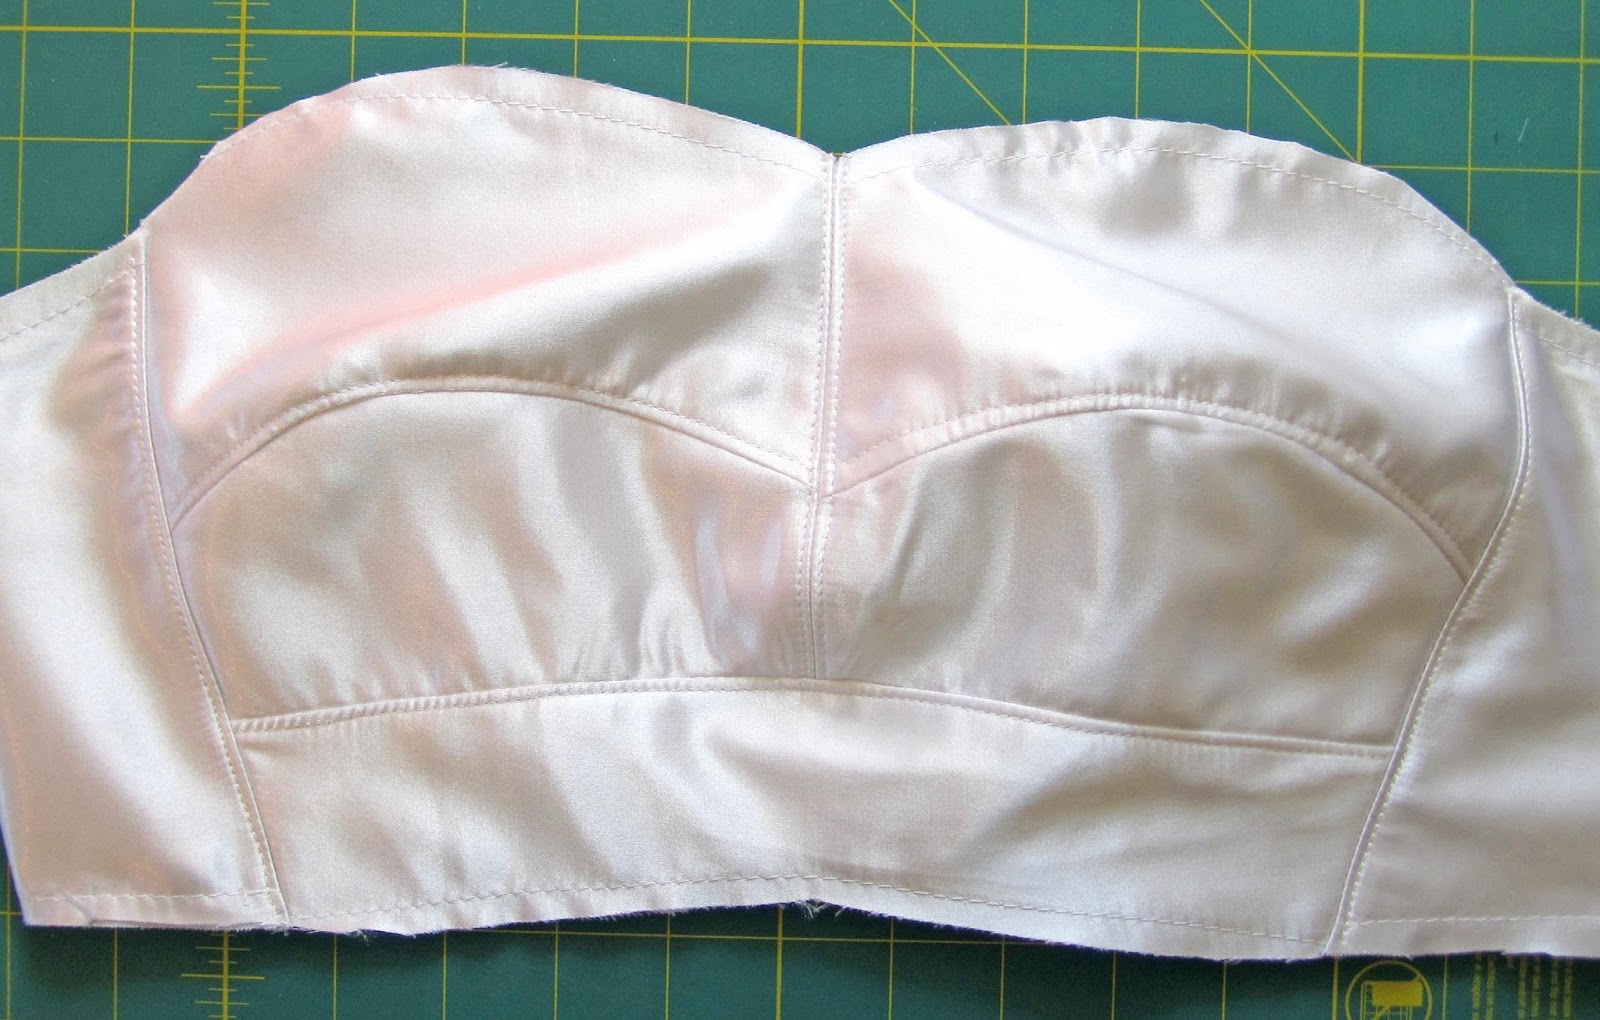
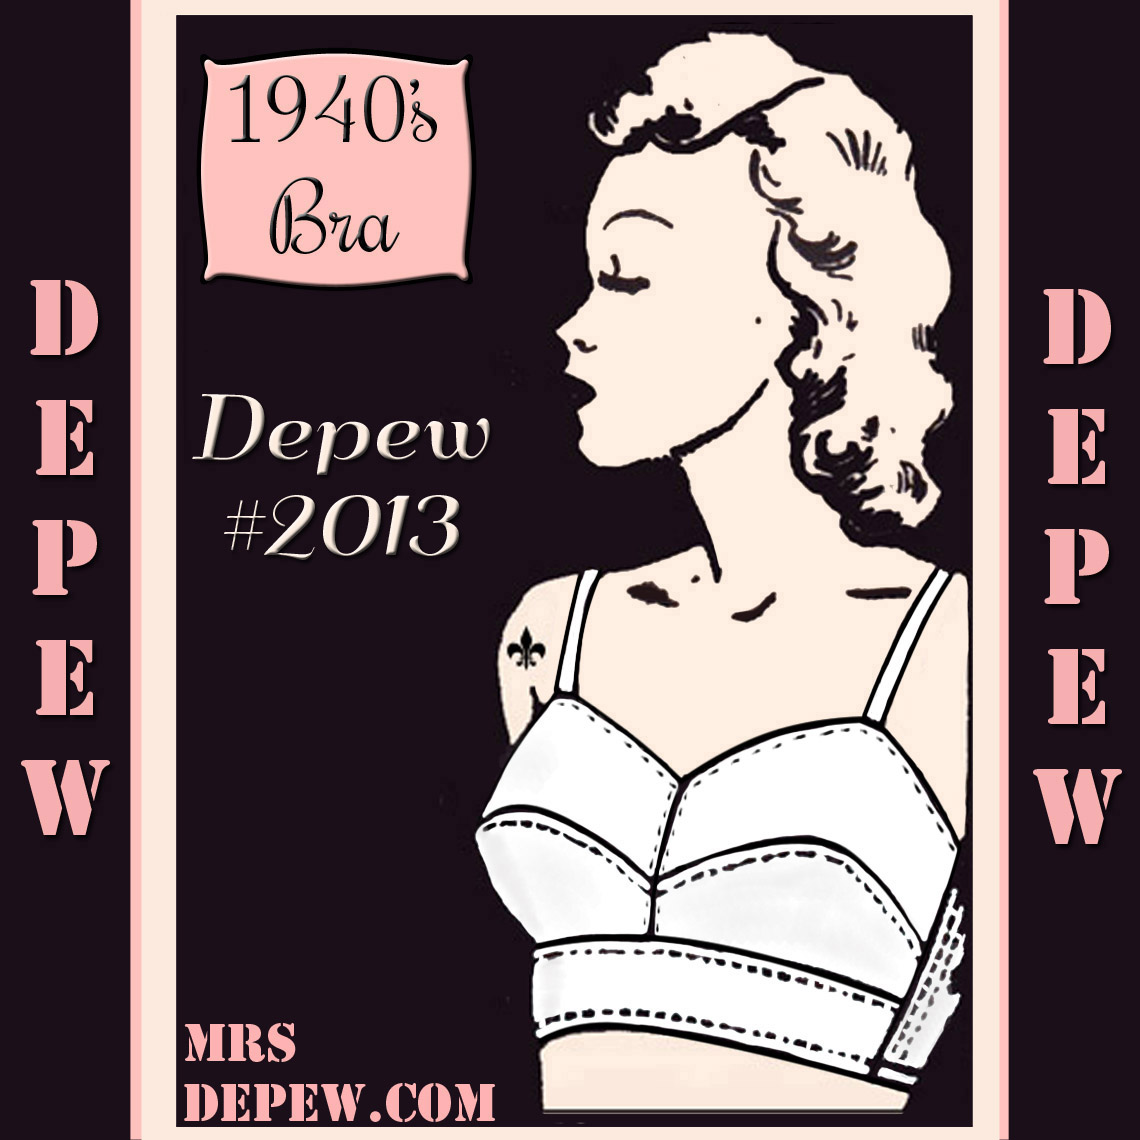
This charming little set can be sewn in 2 versions. Version 1 is an uplift bra that fastens at the center back, Version 2 is a bra for evening wear with a cross-over strap fastened at the front. The panties may be made with or without lace and a full-sized motif pattern is included for applique. 


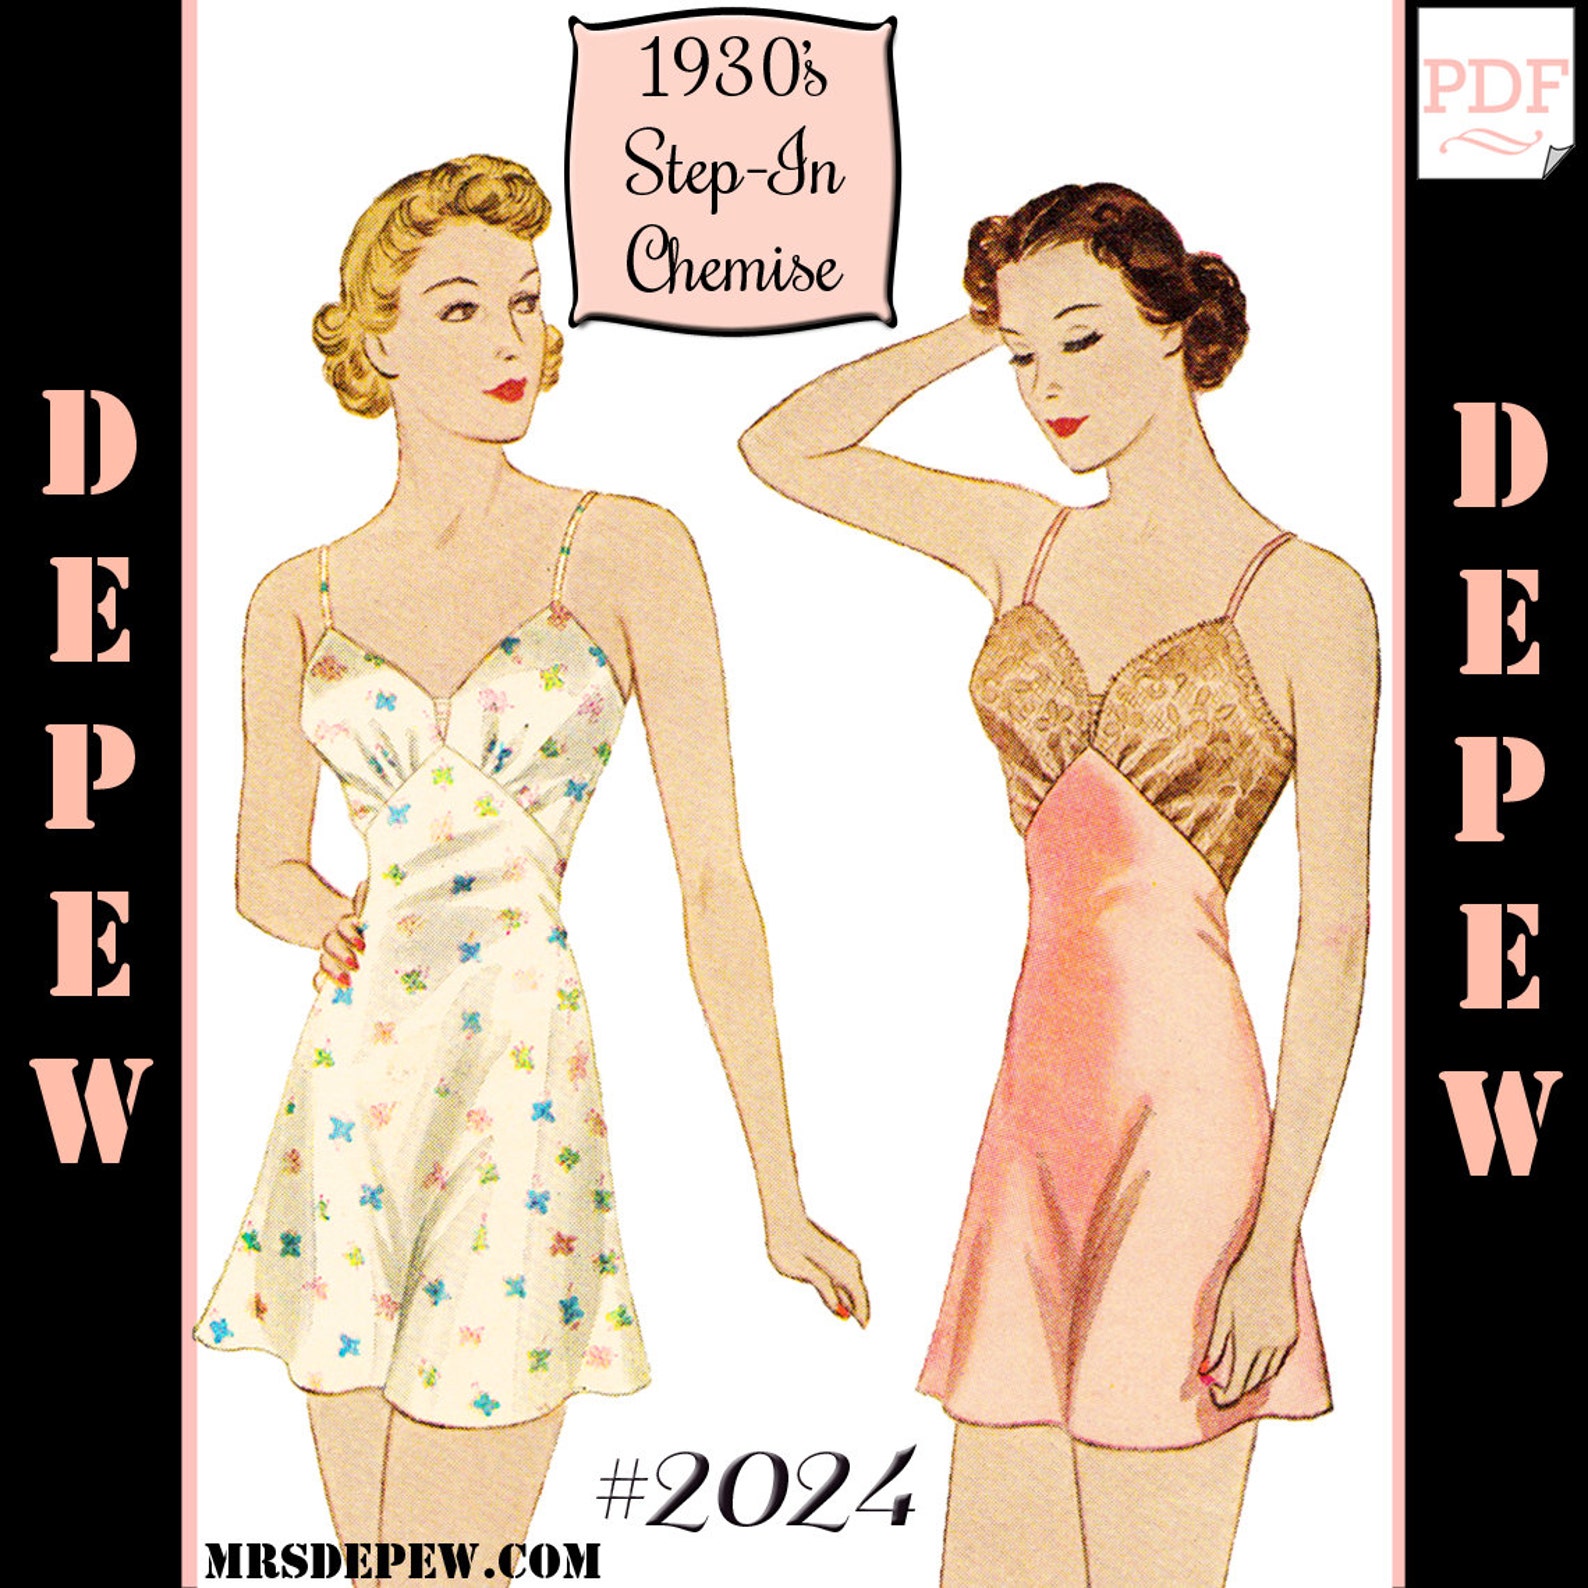
This great step-in can be sewn in 2 ways with either lace or self-fabric uppers. The fitted top has V - shaped neckline and the lower section joins the upper section in a pointed line. 


This corset is a corset in the very loosest sense of the word. It was originally marketed as a Brassiere in about 1920 and isn't necessarily meant to fit too tightly. It can be made from woven fabrics and a hook and eye tape closure at center back. This is the perfect foundation piece to wear under those 1920's day dresses to get that slim, smooth, bulge-free silhouette. 

SIZING: 32"- 50" Bust.


You don't see these very often, they were in vogue in the late 1910's -  early 1920's and acted as a full coverage bra/ camisole. It has a dart at center front and pleating at the sides, can be made from woven fabrics and is trimmed with matching or contrast bias tape. The back closure is a length of elastic for comfort.

SIZING: 34"- 48" Bust.

And that's not all! When I wasn't working on bra sew-along posts, I was putting something very exciting into the works. I'll soon be posting a complete tutorial series on how to draft a Haslam Foundation PatternHaslam Foundation Pattern, adapt it to another design, and sew the whole thing up into a complete garment.
... and I shall call it Project Haslam...


How about you? Have you ever tried the Haslam pattern drafting system? Did it go well for you or was it intimidating? 
Would you be interested in giving it a try if I posted a free pattern for you to use?

Happy sewing,


Sunday, November 15, 2015

1940' Bra Sew-Along - Finishing with a closure.


Hello my dears. I hope you're having a lovely weekend so far.
I just want to start this post out today with a warm hug for my friends and followers in France. Your country was my first love and my oldest friend, and after the events of yesterday, you are in my thoughts and prayers.

It's a chilly day here in Monterey and the sun is at a low angle in the sky. My house smells like a house should on a cold day - hints of apple cider and a pot roast in the oven are wafting up the stairs to my studio. And it's the perfect time to type up a blog post and finish our sew-along.

In our last post we discussed edge finishing and sewing our straps in. Now all that's left to do is add our back closure and we should be done! I know we're all used to hook and eye closures in bras these days and that's what I prefer for this bra. But if you're going for a full 1940's bra style, know that you can also use buttons and loops if you like, or a French bra back, which is essentially two lengths of elastic and a hook.

For this project I have used plush-backed hook and eye tape with a double set of eyes for adjusting fit. This is pretty much plug and play, but there are a few notes on placement.

The first thing to do no matter what type of closure you use, is to stay-stitch the center back of each piece D to keep it from stretching while you work. This can be done with any straight stitch 1/8" from the edge.


Thursday, November 12, 2015

1940's Bra Sew-Along - Finishing edges and adding straps.


Hello again my dears,
In our last sew-along post, we sewed our actual bra pieces together and now we're ready to talk edge finishing. We'll need to do this before we before can sew our straps in place. There are a few ways that you can finish your edges if you're not sewing a whole bra and lining together and turning it right sides out. You can bind your edges, add applique lace at the edges, or my favorite, face the edges with rayon or cotton seam tape.

This is easy as pie and makes a nice, neat finished edge on both sides.
First lay your chosen tape (I like 1/2" wide rayon seam binding) on the top edge of the RIGHT side of the bra. Pin it in place and stitch 1/8" from the top edge.


Now press the tape upwards. This will give you a crisp edge later on. After that, fold the tape over onto the WRONG side of the bra edge and press again.

Tuesday, November 10, 2015

1940's Bra Sew-Along - Sewing the real thing.


Hi there lovely readers. I hope I'm posting at an o.k. rate for you. It's been a strange week and I've been unfortunate enough to have a headache for 5 days now. I went to the doctor today just to be on the safe side and everything is fine - I'm just one unlucky girl this week...
For today's post we're going to sew our actual bra together now! In our last post, we went over lining and facing options. Now that we've squared that away, and you've faced your pattern pieces (if you so chose) we'll put together our bra in the exact same order we put together the test muslin.


This time though, as we sew each individual seam, we're going to stop and press the seam allowance a certain way, then top stitch it in place. This will give us that lovely 1940's look, as well as securing our raw edges.


So we start by sewing pieces A and B together along that tricky curved seam, and then press the stitches as sewn without opening them up. This will set the stitches. Then open pieces A and B, and press the seam allowance UP onto piece A.
Now you're ready to very neatly top-stitch 1/8" from the seam on piece A, as done below.


Now stitch both center front pieces together and press that seam open.


Top stitch again 1/8" from the center front seam on EACH side.

Then sew piece C to the lower edge of pieces B, press the seam allowance DOWN, and top-stitch 1/8" from the edge on piece C.


Now you're ready to attach the back of the bra, pieces D, to the side seams.


Once you have, press the seam allowances outwards to piece D, and top-stitch again.


And voila! You have the lion's share of the sewing done! Next, we'll talk finishing edges and adding straps.

Happy sewing,


Saturday, November 7, 2015

1940's Bra Sew-Along - How to face pattern pieces and lining options.


Happy weekend, sewers! Ready to do some more bra sewing?

In our last post we talked about adjusting our cups sizes. Since I haven't gotten any more fitting questions from you, we're ready to move on.
Today we need to talk about lining options. What should the inside of our bra look like? Well, there are three methods of lining I have used in bra sewing in the past and one is far superior to the others.
The first is fully lining the bra. As I did with my bra #2001 for the Oooh la la Pin Up Sew-Along, you sew two complete bras (minus straps and closures), one of lining and one of outer fabric. Then you sew those two pieces right sides together all along the bottom seam and then bind the top edge. You can also sew the entire bra together at top, bottom and edges, leaving a gap to and turn the bra right side out. This conceals all of your raw seam edges. This can lead to some of your seams shifting a bit and if you have thin fabric, seam edge shadows can show up all over the place.

From a 1940's Brassiere in Profile - the edges here have been turned under and stitched, or faced with a piece of cotton tape.
Another technique is to sew one bra without lining, but of at least medium-weight fabric, and simply bind or turn the raw edges under as done in the bra above. By far though, I prefer to face my pattern pieces and use top stitching and rayon or cotton tape to finish my edges. This is the closest I can get to a historically accurate bra from the 1940's without hunting down some cotton-backed satin (seriously, it's hard to find!).

So to do this, simply cut the entire bra out from your outer fabric (I'm using white satin from our kit), and another entire bra from your lining fabric - I like fine cotton lawn or muslin for this.

Pieces C in satin and cotton, ready to be pinned.
Lay the lining pieces wrong sides together onto your outer (satin) pieces and pin them securely in place. You'll want your right sides to the exterior for this step.

All pattern pieces in cotton and satin, pinned wrong sides together.
Carefully baste each set of pieces together only along the top and bottom edges about 1/8" from the edge.


You will want to leave the left and right edges (side seam, center front and center back edges on all pieces) un-basted. If they are basted at all edges, this can lead to some creases and bunching that won't sit well on the sewn bra.

--Update: This method is a good one to use if your fabrics aren't prone to fraying. The satin I'm using doesn't fray very much so I'm comfortable with having a trimmed, top-stitched, but unconcealed raw edge inside my bra. If you want a more finished appearance on the inside, then you can either fully line the bra as mentioned above (instead of just facing your pieces) or you can finish the raw edges of each seam with either a serger or an edge stitch (a blanket stitch was very common on curved bra seams in the 1940's).

Here is the interior of my bra using the facing/ top-stitching method.

And now you're ready to sew your actual bra together!
Any questions about lining, facing or binding?

Happy sewing,


Monday, November 2, 2015

1940's Bra Sew-Along - Adjusting Bra Cups


It's time to talk about the bra cups! At this point you'll have chosen your size and sewn your muslin (don't worry, no deadline! I'm just posting this now per request). Some of you will find that the bra fits pretty well on the first try (lucky you!).

Here is how the pieces are meant to rest on your figure.

Others will find that they need more or less room in the cup area. That means we need to make adjustments to the seam between pieces A and B.


Above is the seam we're looking at highlighted in blue. For reference, the top of piece A should be about 7" from where a shoulder seam would sit on a t-shirt. The pattern doesn't use cups sizes, as we discussed earlier, but that doesn't mean we can't make cup adjustments. For our purposes, it's a good idea to only adjust cup size one size at a time. This pattern is approximately a B cup depth-wise, and the increase (or decrease) rate is 1/2" per cup.
Warning: adjusting the cups beyond a DD can really change the shape of the bra and it might not look the same after. I'm talking about uni-boob, a very real threat.

This is how you will need to add or subtract allowance from the seam:


Due to the shape of these pattern pieces, I recommend adding the brunt of your changes to the seam on piece B. First trace your pattern pieces onto a new sheet of paper (leave some room around them to make adjustments. To increase the cup size, add 3/8" to uppermost curve on piece B. Add 1/8" to piece A. This will equal 1/2" in total.

Note: If your girls tend to rest more to the side than front and center (some of us carry more fullness an inch or two nearer to the side), then you can shift the added bit to sit closer to your fullest point.

From this added bit, you'll want to smooth the new line to nothing until it blends to touch the side and center front seams at the ends, as illustrated above.
As you add this change, you want to make sure that the seam edges on the left of this diagram stay the same height. These still need to match up to piece D later on.


Now, by adding allowance to this seam, you're actually lengthening the seam line and piece B won't quite match piece A any more. This can be fixed by walking the pattern pieces together to match them up. Measure the difference between the pattern pieces and then add the difference to piece A as illustrated above in pink. If you make any changes to the sides of piece B, keep in mind that it still needs to match up with piece C.

Do the same to remove too much room at the cup seam by subtracting rather than adding the 1/2".

And just like that, you've adjusted your cups! Now it's time to test it again in muslin to see if that sucker fits better.

Happy sewing,


Friday, October 30, 2015

1940's Bra Sew-Along - Sewing Your Muslin


A few of you have already commented on our last post to say that you've gotten your pattern and materials so now is a good time to get started in time for some weekend sewing. Shall we discuss sewing our muslin? This is probably the most important part of bra sewing. Making sure that you have the best fit possible will make all of the work you'll put in worth your while. Every body is different, and breasts themselves have wonderful variations that can make bra sewing a bit of a challenge.
This is why we need a  couple of good test versions to perfect any issues before you cut into your good fabric.


To get started, print your pattern out to 100% scale on your home printer. Tape the pieces together and then choose your desired size.
The pattern comes with several sizes included from a 34"- 44" Bust. For this measurement, we're talking about the circumference of the chest, level with the tip of your bust.

Sunday, October 25, 2015

1940's Bra Sew-Along: Where to get your supplies...


Alright then, my dears, it's time to collect our bra-making materials!
Since this is a vintage-inspired bra pattern, the materials won't be quite too hard to find. No need to hunt down underwires or anything like that.

So, here is a list of what you'll need:

1. The pattern. 
2. 1/2 yard of 35" or wider muslin fabric for testing the fit.
3. 1/2 yard of 35" or wider light to medium weight woven (non-stretch) fabric for the outer. I recommend soft cotton or lawn, satin, silk or rayon crepe, or even charmeuse.
4. 1/2 yard of lining fabric (if you choose to line, that is.) I recommend lightweight woven (non-stretch) cotton lawn but the general rule of thumb is, if you don't want it touching your girls, don't line a bra with it.
5. Purchased bra straps. You can use medium to heavy weight ribbon, but adjustable straps are so easy to just sew in.
6. 1/4 yard of plush-backed hook and eye tape, preferably adjustable with at least 2 sets of eyes.
7. Matching thread.


The kit includes enough fabric to test, sew and line your bra, straps, closures, thread, and the pattern.

But if you're not up for white satin, here are a few places I recommend:
Bra Maker's Supply (great for straps and closures).
Sew Sassy Fabrics (great for fabrics and notions).
Etsy.com (great for fabrics and notions).


Once you've got your materials, just leave a comment on this post to let me know you're ready to get started. Keep in mind that sew-alongs don't need to have deadlines, and if you're busy now, or if you need at 2 week break in the middle, the posts will ALWAYS be here on A Few Threads Loose and you can follow along to sew your bra any time that works for your schedule!
Don't forget that you can always leave comments if you have a question about anything - materials, tips, tricks, posts etc. - I'm here to help and there is no such thing as a stupid question here!

This Sew Along is now complete. Click below for each post.

Happy sewing,


Saturday, October 24, 2015

1940's Bra Sew-Along Giveaway Winners!


Happy weekend, my lovely readers!
I have had the most delightful day and I hope your Friday has been just as lovely. I had a dear friend over for afternoon tea today and I got up bright and early to try out an new recipe as well. I'm so glad I did, because the Zucchini Coconut Bread that came out of it was simply heaven. I used a recipe found on Pinterest from a blog called Two Peas & Their Pod and I can't recommend it enough. It was rich, moist, and incredible smothered with European butter.

Image courtesy of Two Peas & Their Pod
If you hadn't already heard, I'm a huge foody and if I'm not working on drafting sewing patterns, I'm either cooking or baking up a storm (and reading ravenously whilst things simmer). If you're a foodie too, you can find my Pinterest Board of favorite recipes here.


But now it's time to announce the three lucky winners of the 1940's bra pattern giveaway!

Our three winners (as chosen by random.org's random number generator) are Judy Cinerari, OnePerfectDay, and LivingVintage.etsy . And our fourth surprise winner, because I'm just in that kind of mood, is Bex!
Ladies, if you could email me your contact info at afewthreadsloose@gmail.com, I can send you your prizes!

I'll post later this weekend about the materials we'll need for our bra-making sew-along, as well as where you can find them. We're going at a slower pace for the sew-along because a lot of our participants might be buying their supplies overseas and shipping can take a bit of time. I want to make sure you've got everything you need before we start so you don't feel like you have to play catch-up!

In the meantime, if you decide to get a head start, here is a coupon code for $3.50 off of the price of the digital bra pattern at MrsDepew.com:
SEWALONGSALLY.
The coupon code will work until November 30th.

Happy sewing!


Friday, October 16, 2015

1940's Bra Sew-Along, and a Sewing Pattern Giveaway!


Update: This giveaway is now closed.

Well, my dear readers, it's that time again. I have the lingerie sewing bug. It's been ages since our last sew-along and I'm happy to say that my schedule has cleared just enough to allow me to host another one!
And the pattern I would love to make with you is my absolute favorite bra pattern, Depew #2013.

1940's style bra pattern Depew #2013 32"- 44" Bust.

I just most recently made this bra up in white satin and it turned out so beautifully, I thought, "Every girl should have one of these!" I wore this bra ll day yesterday under a semi-sheer top and it was so comfortable! I even had a lady approach me at a shop and say, "This is going to sound weird, but where can I buy a bra like the one you're wearing?" It seriously made my day.

Sadly you can't get a bra like this in stores anymore but I've had something in the works for a while now to make sewing your own easier and a bit more fun.
I've been working for months now to grade this pattern into many more sizes and have also partnered with Take & Make to offer a complete bra sewing kit with everything you need (including the pattern download) to sew the bra pictured below.

The bra sewing kit for pattern #2013.

The kit includes ready made straps and plush hook and eye closures that have been carefully matched with soft white satin, thread, and enough fine, soft muslin to sew a test version, with enough left over to line the bra if you should so choose. You can find the complete kit here.


We decided to go with white satin for the kits so that finding matching underwear wouldn't be a chore.

In one of my most recent posts we looked at an original 1940's bra to study the sewing details used. I'll be including these kinds of details in our sew-along posts and hopefully we'll all get to learn something new.

Top-stitch details are almost a must for any vintage bra!

And of course, this would be no sew-along launch without a giveaway! Next week I'll choose three winners from the comments on this post who will each get a digital copy of the bra pattern we'll be using.
To enter the giveaway here on A Few Threads Loose, simply leave a comment on this post letting me know you're in!

For an extra entry, you can do any or all of the following, just leave a comment letting me know about it!

I'll announce the winner of the giveaway on October 23rd and then we can start gathering our materials for the sew-along.


Happy sewing, and best of luck to the entrants!


Tuesday, October 13, 2015

Get the look: Claire Randall's 1940's Blue Coat.

I don't know about you, my dear readers, but one of my favorite books is Outlander by Diana Gabaldon. If you haven't read it yet, it's a wonderful historical tale with a heroine you can't help but love, and a plot you can't help but get hooked on. Showtime has been slowly and quite carefully recreating this amazing series (oh yes, did I fail to mention there are several books to this tale you'll love?) into a TV show with beautiful cinematography, excellent casting, and HEAVENLY clothing.

One of the most popular looks on the show so far has been Claire Randall's beautiful 1940's coat and hat from Season 1. Recently, I saw a Facebook post asking for patterns to get the look and it got me to thinking... I have those patterns! So, without further ado, here is how to get the look!


The perfect pattern for this is Depew #4185 which can be easily adapted to look like the coat above.
Instead of three buttons as pictured below, just sew a tab and use one button. The sleeves and pockets are nearly identical but the difference is the fullness at the back.


To add that fullness, you can use the simple slash and spread method with the back of your pattern for added pleats:


And on to the hat, I have that one too! This is a great translated vintage French hat pattern from the late 1940's that has four hats included. The version to copy Claire's (somewhat hard to see) hat would be model B From Depew #1022.


How about you? Is there a TV show out there with clothing you just can't get enough of? I know some of us might consider ourselves a bit too grown up for teen dramas, but I'm going to admit, I also love to watch Reign from the CW. It's a probably definitely not-very-historically-accurate dramatization of Mary Queen of Scotts, and I could say that I just watch it primarily for the clothes, but that we be a lie... I watch it for the crazy guilty pleasure of will-they-or-won't-they soap opera drama!

But seriously though, the clothes!


Of course they've used loads of creative license (and by lots, I mean all of it) in the costuming but it's such a refreshing spin that I find I look forward to the blatant fashion historical gaffes rather than being annoyed by them.
You may now proceed with violent disagreement. It's ok, I know, I sort of deserve it. Like I said... Guilty pleasures and what-not.

xoxo


P.S. You know how we might have been talking about a bra sew-along? Stay tuned, it's going to happen soon!